


Amazon Promo Invincible

The Boys Billboard
Design + Print Custom Tile for a Vintage Set

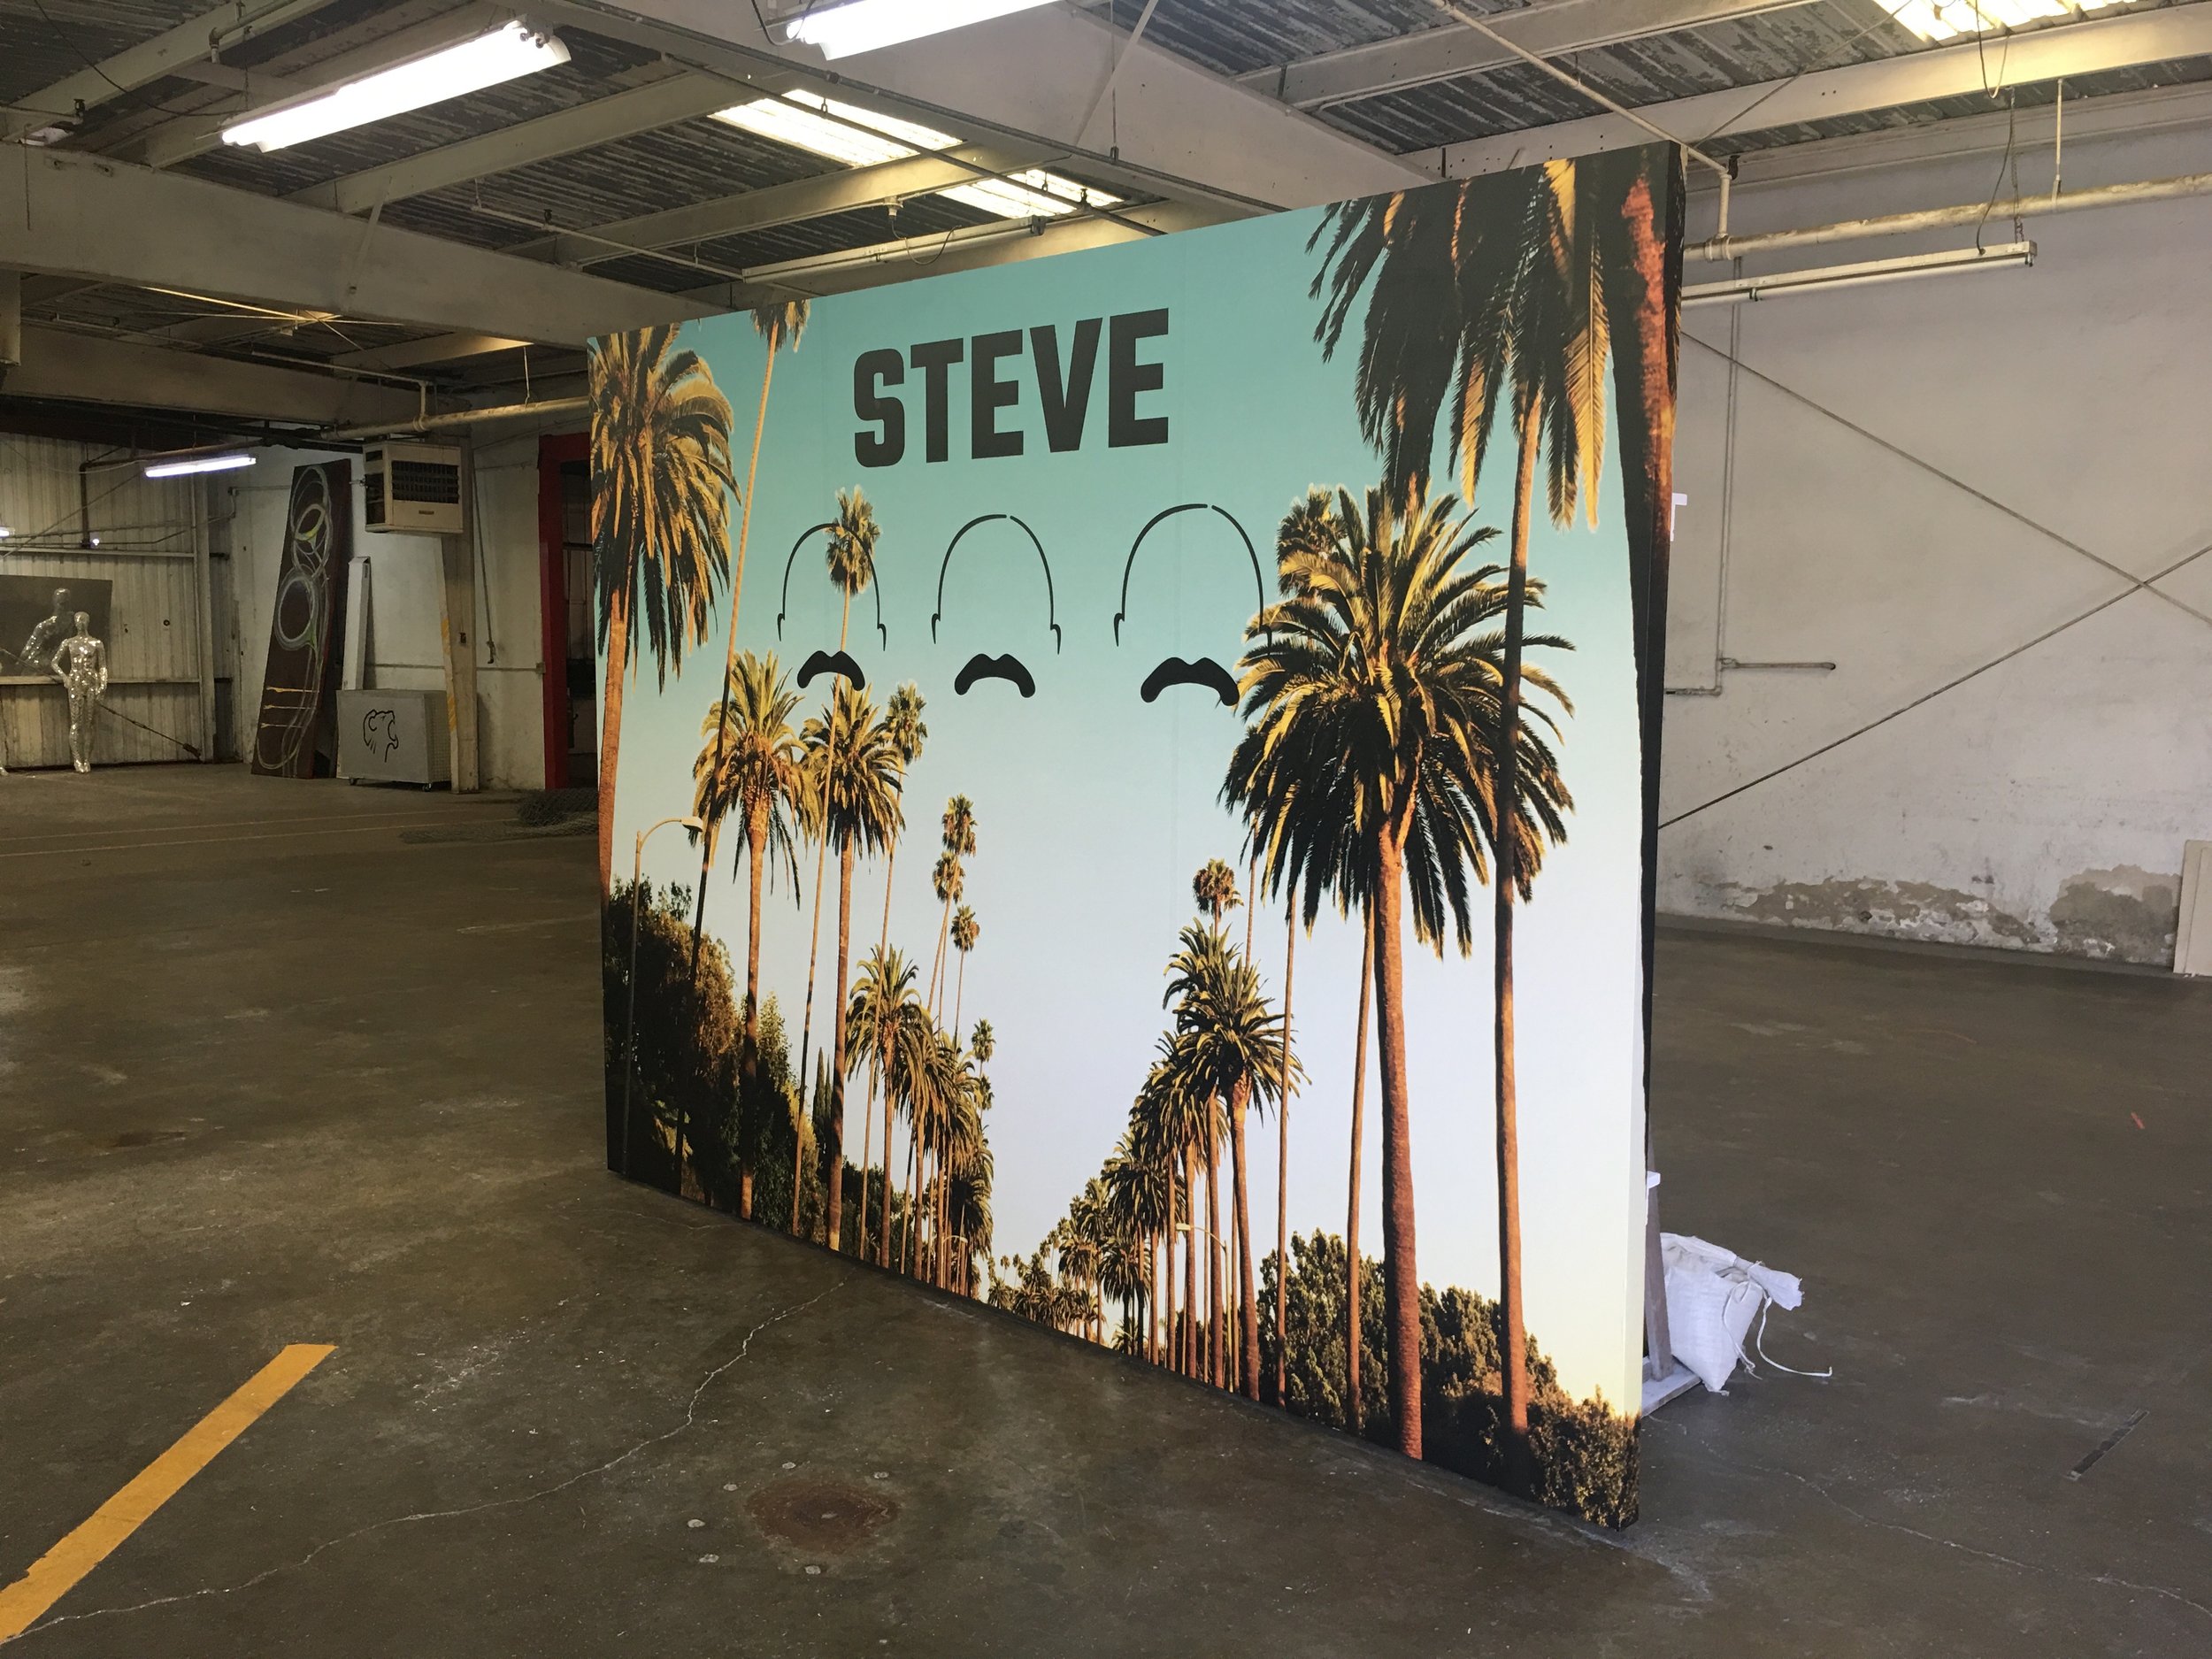
Wall Wrap for Steve Harvey Promotion

Dispensary Office Mural
Optical Illusion on Floor Guard
With Wall Wraps Becoming Increasingly More Popular We’ve Added Quite a Few Options to our Arsenal.
From Short Term Location Wall Wraps to Permanent Office Decor We Have You Covered!
Wall Condition and Preparation for Vinyl Wrapping
As a vinyl installer, it's crucial to ensure the wall is in the best possible condition before applying the vinyl wrap to achieve a flawless result. Here’s a detailed breakdown of the factors that can impact the installation process:
1. Surface Cleanliness
Why It Matters: Dust, dirt, grease, or even small particles on the wall can interfere with the adhesive bond of the vinyl wrap, causing bubbles, peeling, or poor adhesion.
What You Need to Do: Clean the wall thoroughly using a gentle, non-abrasive cleaner (preferably a mixture of water and mild detergent). Wipe down the surface to remove any oils, fingerprints, or residues from previous paint or cleaning products.
Tip: If there are greasy spots, use a degreaser. Allow the wall to dry completely before proceeding.
2. Smoothness of the Wall
Why It Matters: A smooth surface is essential for achieving a seamless, professional finish. If the wall has texture (like rough patches, dents, or uneven paint), it can affect how well the vinyl adheres and how it looks after installation.
What You Need to Do: Ensure the wall is as smooth as possible. If there are imperfections such as cracks, holes, or bumps, these should be patched and sanded before applying the vinyl. A smooth, uniform surface will help the vinyl wrap adhere better and result in a more polished finish.
Tip: If you're dealing with a highly textured wall (e.g., stucco or textured paint), you may want to consider alternative solutions, such as smoothing out the texture, or opting for a different type of vinyl wrap that works well with textured surfaces.
3. Type of Paint (Low VOC vs. Other Paints)
Why It Matters: The type of paint on the wall plays a significant role in how the vinyl will adhere. Low VOC (volatile organic compounds) paints are popular due to their environmentally friendly nature, but they may not provide the same adhesion strength as traditional paints or oil-based paints. This could result in vinyl wrapping not sticking well or peeling over time.
What You Need to Do: Ensure that the paint is fully cured. Low VOC paints often take longer to cure than standard paints, typically around 2-3 weeks. Applying vinyl too soon on an uncured paint surface can cause the wrap to peel off or form bubbles.
Tip: Test the adhesion on a small, inconspicuous area to confirm that the vinyl will stick properly. If the wall has low VOC paint, consider using a premium, high-adhesion vinyl designed to work with this type of surface.
4. No Peeling or Damaged Paint
Why It Matters: Any peeling, cracking, or bubbling paint can compromise the vinyl wrap’s appearance and longevity. If the paint is unstable or damaged, it could cause the vinyl to lift or tear.
What You Need to Do: Check for any damaged or peeling paint and address it before wrapping. If you notice the paint isn’t adhering properly in some areas, it's best to fix or repaint those spots before applying the vinyl.
Tip: Use a primer or bonding agent if the wall’s paint surface is inconsistent or shows signs of wear.
5. Avoid Moisture or Humidity
Why It Matters: High moisture or humidity can negatively affect both the paint and the vinyl. Excess moisture can lead to the vinyl peeling, air bubbles, or mold growth underneath the wrap.
What You Need to Do: Ensure the wall is completely dry and that the room’s humidity levels are controlled before beginning the installation process. It’s best to avoid applying vinyl in damp or humid conditions.
Tip: If you’re working in a bathroom or kitchen (areas prone to moisture), use a vinyl designed specifically for high-moisture environments.
6. Temperature Considerations
Why It Matters: Both the paint and vinyl wrap are temperature-sensitive. If the wall or the room is too hot or too cold, it can affect the installation process and the overall finish.
What You Need to Do: Ensure the room temperature is between 60°F and 80°F (15°C to 27°C) for the best results. Applying vinyl in extreme temperatures can cause it to stretch, shrink, or fail to adhere properly.
Additional Tips for Preparing Your Wall for Vinyl Wrapping
Test Adhesion: Before applying the vinyl to the entire surface, test a small section to ensure proper adhesion. This helps you identify any potential issues before committing to a larger area.
Curing Time for Paint: If the wall was freshly painted with low VOC paint, allow it to cure for at least 2-3 weeks before wrapping. Applying vinyl too soon can cause bonding issues.
Use Professional-Grade Vinyl: High-quality vinyl that’s designed specifically for wall applications will provide better adhesion, durability, and easier removal in the future.
Consider Wall Usage: If the wall will be in a high-traffic area, choose a durable vinyl that can withstand wear and tear over time.
By taking the time to properly prepare the wall and ensure it’s in ideal condition, you’ll achieve a high-quality, long-lasting vinyl wrap that enhances the space without compromising on appearance or durability. As your vinyl installer, I'm here to guide you through the process and make sure everything is perfect before installation begins!